Before Takeoff
- Safety Switch Check: Prior to approaching the aircraft to interact with the installed payload, confirm that the safety switch is enabled. This is done by confirming a persistent audible beep is heard coming from the aircraft. Additionally, the parachute light indicators blink in an alternating fashion between the colors blue and cyan until the safety switch is disabled.
Walkaround: Complete a final visual walkaround inspection ensuring that the parachute tether is in place and no cables are located within the propeller path.
Winch LED Status: If applicable, confirm flashing green LED light located physically on the right side of the winch housing.
- Dynamic External Load Loading: If applicable, load dynamic external load (package) onto the winch, if performing a package delivery or in-flight simulated delivery. See below for the detailed loading procedure for the Sebastian winch. Delivery boxes may be reused up to 10 times for delivery flights. Usage counts can be recorded by marking the side of the delivery box. Once used for a delivery, the delivery box may not be used for package delivery to a customer.
Follow normal safety precautions as outlined below when using the winch.
The RPIC should exercise extreme caution when they, or other crew members, are within the designated safety area. External loads are only permitted to be attached to the winch system on the winch grasper.
Inspect the winch line for entanglement, an uneven spool, and visible wear prior to loading the package onto the aircraft.
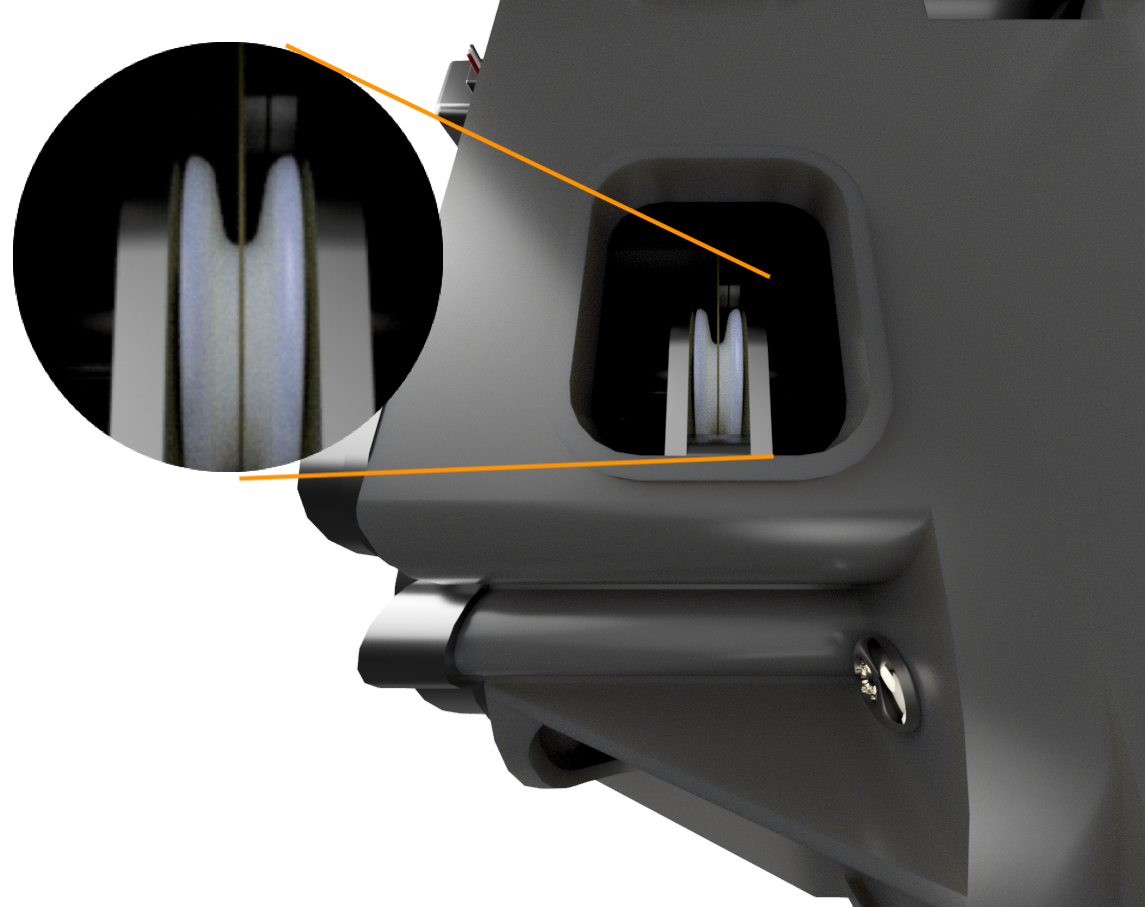
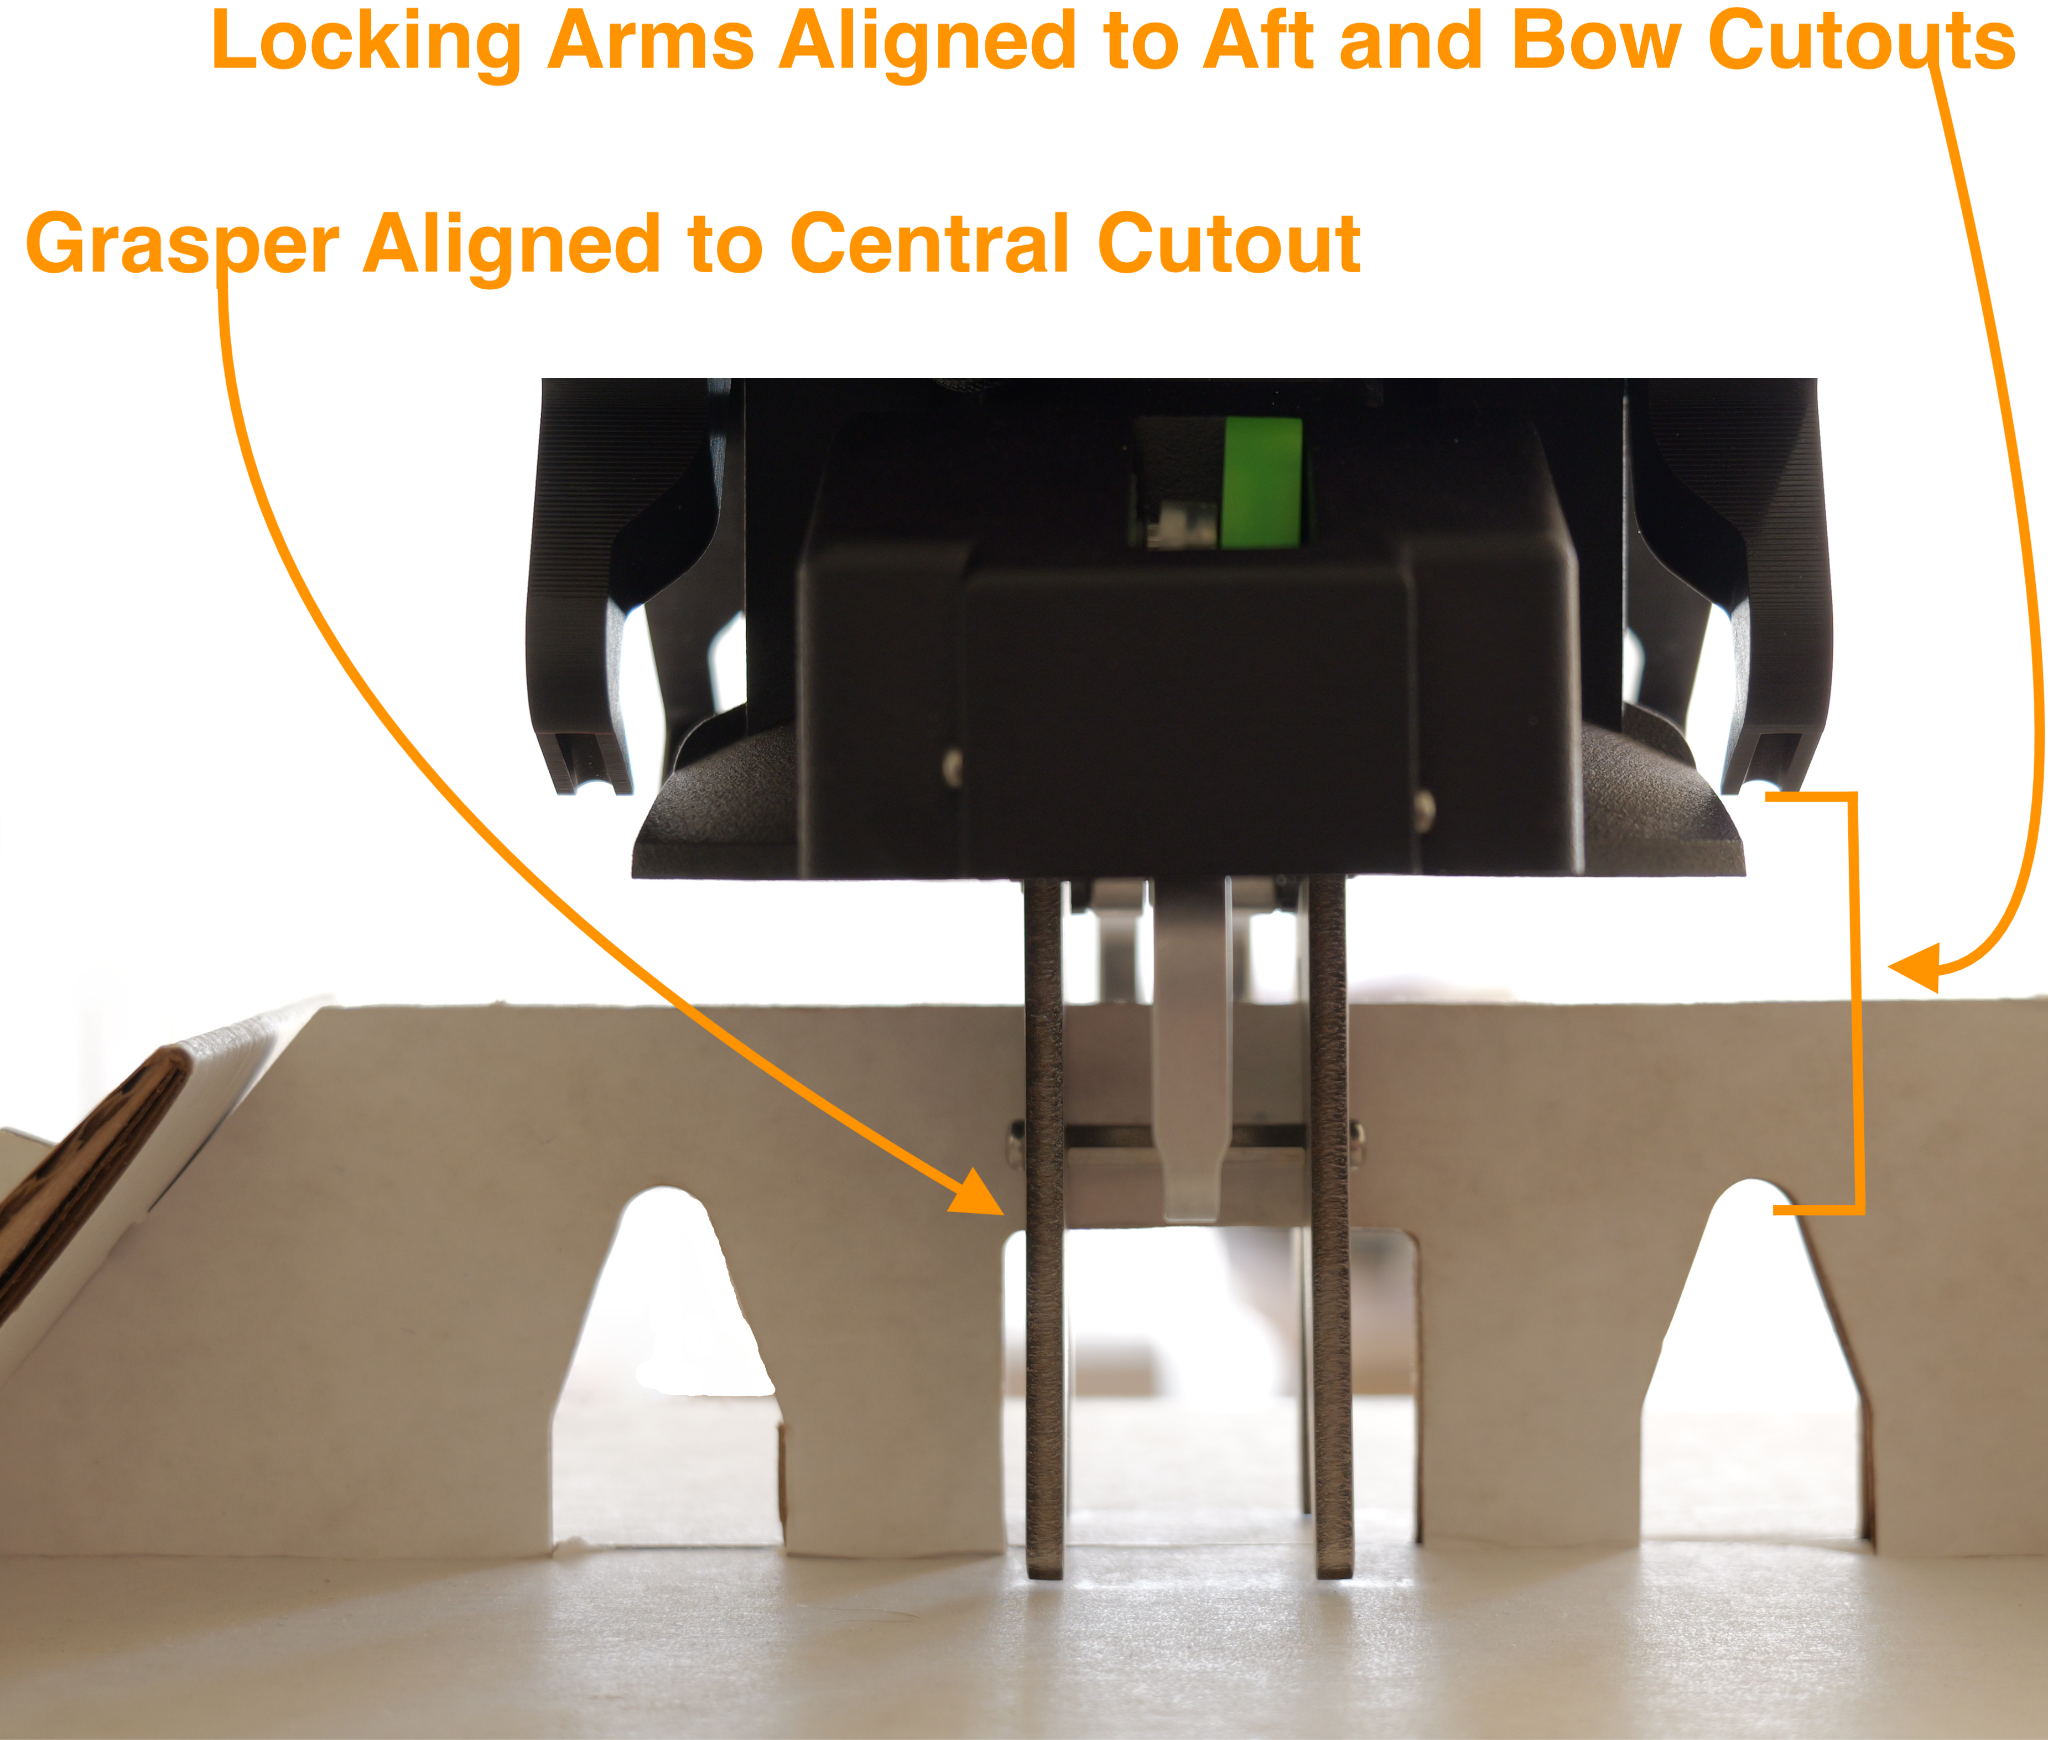
To load a package on the Sebastian winch, ensure the grasper is aligned with the central cutout of the package and the locking arms are aligned with the aft and bow cutouts. Once aligned, lift the package into the winch and listen for audible clicks of package acceptance. Once properly attached, the flight lock arms will rotate down and through the aft and bow cutouts of the package. After the package is attached ensure the winch line is correctly aligned on the pulley, see Figure 3-12.
Winch and External Load Hardware Status: If applicable, confirm that the delivery box, winch grasper, and (to the extent visible) winch line are aligned parallel to one another.
Safety Switch Disabled: Press either safety switch button located within the housing of either GPS module housing. A single audible beep will be made, followed by stoppage of the persistent single audible beep that was being announced while the safety switch was enabled. At this point, the aircraft is ready for arming.
Parachute Status: From outside the safety area, confirm that the parachute canister indicator located on the canister is blinking green.
AMC Status: Inspect on the AMC GCS Fly View screen that the aircraft status is Ready to Fly, which will have a green background indication. This confirms that the AMC software has checked its C2 link with the aircraft, as well as telemetry data received, and verified that the aircraft is prepared for takeoff.
Uncrew Mission Manager: Inspect that the aircraft status indicator is green. Confirm the mission route and altitude is correct. Confirm AGL altitude is 0 feet +/- 8 feet. Confirm winch status is “Locked”. Assign mission to RPIC.
HubOps MCA: If applicable, select “DELIVERY POINT SET”.
Flight Alerter: Select the current flight plan and confirm the correct flight path.
Uncrew Mission Console: Confirm the mission has been correctly populated.
Safety Area All Clear: Visually inspect the safety area to ensure that the area is secure with no obstructions and no persons present within the area. Once this visual inspection is complete, announce “Safety Area All Clear” to indicate that the area will be in active flight operation usage for a takeoff.